Sunday, August 7, 2011

Otakon 2011 Friday

      Well, you know what they say about the best laid plans. We were planning to do FFX, but inexplicably left some crucial stuff at home. So we just checked in, so fast, and wandered about in disguise, as ourselves. Much easier to get around the dealers room this way. Some contacts and a Soul Eater shirt for the kid, then we go find a few friends like Maki and EBK. But first, we ran into and took pictures of our friend Tohma and didn't even know it. Because she was wearing this.
Tohma as Ravage
Can't believe we didn't recognize her, our bad. An amazing cosplay. Next we ran into our cosplay daughter Maki and her friend the Captain. 

Just then an awesome Bucky showed up and they looked great together.

Well done guys.One more thing before we have to get into our Darkstalkers stuff. I had to take this picture of Stein and Medusa from Soul Eater, cause our Brendan loves that show.

Now it's time to go back to the room and get all Darkstalkery. Here are the girls getting their Morrigan and Lilith on.
Maki, Kimi and my FFX chest on the left.
Now, we love group photo shoots, but an outdoor shoot at Otakon is not a sane idea.There was a reason people needed ice cold water it was 100 F-ing degrees. So this one was at the outdoor fountains, great. What a surprise it turned out to be a bit of a C.F. A tad disorganized. We took a pic or two and beat feet. We did get a few decent pictures inside near the fountains. The first couple from the awesomely cool Eurobeat King.

Two beautiful girls by EBK.

Morrigan, Donovan Baine and Lilith by EBK.
I must mention our dear friend Regena helped us out the whole time even going outside into the furnace. We also took a few with a talented photographer Paul Karpey.

Morrigan and Donovan by Paul.
I liked this one, and Kimi really liked this one.

Morrigan by Paul.
After all that picture taking we went to dinner at a really nice place. Right across Charles street from the Convention Center is the Kona Grill. It was pretty damn good. It's not that cheap, but they have great happy hour specials.
Kimi at the Kona Grill.
 Friday night consisted of lots more wandering with Regena, leading finally to our going to this fan parody video thing. Everyone seemed far more entertained than we were, but perhaps we were a bit tired. We retired.

Wednesday, August 3, 2011

Otakon 2011

      First of all, here is our Flickr of all our good Otakon pics.
                               http://www.flickr.com/photos/52656279@N02/sets/72157627208961199/
      Full report to follow.

Tuesday, April 5, 2011

Webcomics We Like: Dr. McNinja

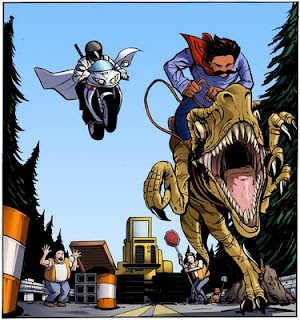
      Dr. Mc Ninja is truly an insane webcomic.  But for some strange reason it all seems to make sense.  McNinja is from a long line of Irish Ninja's, and his parents are very disappointed with his choice to become a doctor.  Even though he is actually still one of the greatest ninja.  From this premise things get much, much weirder.  His side kick is a 12 year old bandito who rides a velociraptor, and grew a mustache through sheer force of will.  This all still makes sense.  If you don't already, you should read Dr. McNinja.

Sunday, April 3, 2011

Project: Basic Cosplay Weapons: Mai's Daggers

      Mai from Avatar has quite an array of weapons.  I already made a set of her simple stillettos, now I'm making the more difficult, but still relatively simple daggers.  I do a lot of work like this out of cedar, but for this project I'm using poplar.  This is because I want these to be pretty thin and half inch poplar is readily available at hardware stores.  So I started out with a 4' x 1/2" x 3 1/2 " piece of poplar.  I cut it into 4 pieces of about a foot each.  Ah, but wait, I need a pattern.  I took the Mai's weapons schematic, and blew up the picture to make the dagger the size I wanted.
Great Mai weapons schematic.
The 4 blocks with the pattern on top.
I printed out the picture and used spray contact cement, a really useful product, to stick it to a file folder, then cut it out.  To make it easier to cut I took two of the blocks and used contact cement again to glue them together. That way I only have to cut twice to get four pieces. Of course I took my pattern and traced it on to the wood, then cut it out with a jig saw.
And here's 4 blanks ready to carve and sand.
If your'e ever making blades it is very handy to mark the center of the blade all the way down the piece. I do this with my center marking gauge which is very useful if you'll be doing this sort of thing a number of times.  Of course, if you don't have one, and who does, I made a simple substitute with two popsicle  sticks, a pencil and tape. I cut a notch out of one of the sticks, marked the center and taped a pencil on the center line, see picture.
At right a center marking gauge, at left my makeshift one and in back the blanks with the center line marked.
Now it's time to start carving.  You don't need to carve the whole blade, your'e just removing some stock to make your sanding easier.  With wood there is a definite direction to carve in.  Generally with these you want to carve from the tip down to the middle of the curve and then stop and start from the other tip to the middle.
Carve to the middle then stop and start again from the other tip. Keep your hand behind the blade.
As I said you don't need to take a lot off, just enough to establish an edge, most of the work is with a sander. About that, if you are going to do more than one project like this, you will want to get a Random Orbit Sander. Not a 1/4 sheet sander, not a belt sander a Random Orbit Sander. I saw a ton on eBay for 25 to 50 dollars brand new and used ones from 10 bucks. This sander will open up a lot of cosplay possibilities for you. O.K, you need to work your way around the whole piece with a knife. Now it's time to sand.
This is how little I carved the edges.
So know I hit the edges with the sander working all the way around. The sander really works fast. Use maybe an 80 grit or 100 grit at first then change to a 120 to150 grit. you can experiment and use what works best for you.
Working with the sander.
I kept going until I get pretty good edges. Fro there I finish up with sandpaper. I really like sanding sponges, you can get them at any hardware store and they are great for edges and detail.
After some good sanding.
So after a bit of hand sanding I finally like the overall look. Time to think paint. I did some tests on a piece of scrap wood with a bunch of colors and I could not find one I really liked. So I'm going to mix some. If you do this you need to stick to a formula, hopefully 50/50 cause that is easy to replicate. So I mix 1/2 golden brown with 1/2 brown and I think that's about right.
The sample is brown on right, Golden in middle, and custom on left.
When you have a good blade edge it's pretty easy to see what you need to paint what color. Start with the brown mix and paint the inside. I found a few chips on the edge so before I paint I will fill them with spackle and sand it before I paint.
A couple nicks get repaired.
Now to paint the edge with some metallic silver craft paint. Metallic paint seems to cover other paints a little better, so this is best used last.
I like to paint on a new paper towel cause it's such a clean surface.
Here's the lot of them.
Now we have to wrap the handles with leather like Mai's daggers are. At the fabric store it is pretty easy to find a fake leather 1/2 inch trim. This project requires one yard, $3 a yard. I cut one end straight and hot glued it to the edge like so.
Hot glued to the top of the wrap.
 Next you wrap it around a few times, this requires some experimentation. You are going from the top bend to the lower bend. At the bottom I made a slightly angled cut and glued it down.
Wrapping
Cutting the end at an angle and gluing it down.
So after a bit of work here's how it ended up.
Not bad
The wrap is a bit tricky you have to play with it. I think it came out very well though.

Thursday, March 31, 2011

Projects: Lilith Bat Ears: Darkstalkers

      The first project I did with Fossape was a relatively straight forward head piece for Alcyone MKR.  This is a bit more complex.  You have to do things like lapping and fusing the fosshape, and also doing spines.  It's still not all that hard, just follow along.  Of course, with any project the layout is important.  Now with something so organic like wings or "ears" you have to decide what you like.  I decided here for perky, and active rather than withdrawn  .With fosshape properly worked you can make pieces that stick out very far without any sag.  First you have to make a pattern.  This is more artistic than mechanical on this one.  Here's the picture I used as a model.  It's actually Morrigan, but the sisters have the same " ears, " and there are a million more pictures of Morrigan than Lilith.

So I made a pattern and I pinned it to a piece of the Fosshape 600. You always have to remember that Fosshape and similar heat activated products will shrink. I like to make a pattern for how I want it to turn out and cut it a half inch or more larger.  But, you can give yourself even more wiggle room, cause Fosshape is very easy to shape with scissors after it has been heated.

I know it looks ragged but there is a lot you can do once you start shaping.  I use a flat iron at it's highest temp setting for working Fosshape.  You need a hair flat iron that you can use exclusively for projects, never again for hair. This piece is going to need some strength to stick out that far.  So we need to fold the Fosshape over and fuse it to itself.


Fold it over, than press it together with your flat iron. To fuse it together you'll have to hold it for 15 seconds or so, depending on your iron.  For straight areas you can use the full length of the iron, for curves you have to use just the tip.  Keep in mind the side you fold to is now the back..  Next, you have to do the bottom part and fold over the stalk which needs the most strength.

  Now you have to work your way all the way along the top edge, this is where you need strength as well.  So fold all the edges along the top and the small section going off the stalk on the bottom.

Now this is done it's time to start some shaping.  Heat a section good and then sort of hold it in the shape you want, after a several seconds it will start to stiffen.

You can get the hang of this pretty quick.  One thing to remember is that it is very easy to trim this stuff with scissors once it hardens.  So if your edges look bad or the shape isn't quite right, don't worry.  At this point you are just giving curve to the piece.  After you get some curve, you need to do some spines.  You want to start at the tip of the middle spine and work your way to the claw. The spines are on the front of the piece, not the back that has the folds. With this technique your'e pinching the Fosshape together in your flat iron.

This is a little easier than it sounds but it gets difficult to do near the claw where the material is already stiff.  

This what it will look like once your'e done.  Now you want to bend the small bottom edge and the top edge in toward your new spine a bit. Just go around the edge with the flat iron bending it up a little.

Now you are at a point where you can dish or bend the area between the spines.  This can be done with your flat iron as far as it can reach.  You might need to harden the part you can't reach with a hair dryer on high.  This takes a while.  It would be better to have a heat gun on it's lowest setting.  You can get a cheap heat gun for $ 30 or less.

WARNING.  If you are using a heat gun do not get it to close to the piece or you can burn a hole right through it.  Your'e going to have to play around with this a while.  You might want to take a small piece of Fosshape and practice these techniques before you do it on a real piece.  Now the whole thing is hardened take some scissors and shape it to your liking.

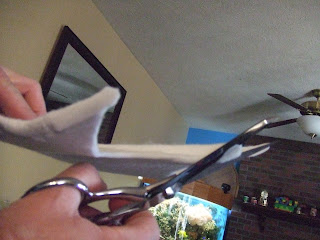
Here I'm cutting the middle spine at a jaunty angle.  But shape the whole piece to your liking.  Once your happy with it it's time to paint.  Spray paint seems to work real well on Fosshape.  Last pair of these I did I winged it, but this time I'm going to mask it.

I masked it with blue tape and sprayed the hell out of it with red gloss plastic spray paint.  Then I let it dry for a long time, overnight is best.  Now to mask over the red and paint the inside part black.

Well there was a bit more bleed thru than I liked.  I tried to cover the black that bled and the red wouldn't cover.  I ended up using some craft paint that happened to be a perfect match to finish it up.  I also used Ivory craft paint for the talons.

Well here they are done. They came out pretty decent.  Have at it.  Oh yeah, here is the Dazian website where you can order Fosshape

Sunday, March 27, 2011

Web Series We Like: There Will Be Brawl

      It's hard to describe the brilliance of There Will Be Brawl.  Here is the beginning of the  info page from their site." In a dystopian Mushroom Kingdom, corruption and avarice reign supreme." Brawl is a very adult show that utilizes many well known Nintendo characters like Mario, Luigi, Peach, Link, Kirby and a ton of others. Their behavior is a bit different from the games, although you may have suspected some of it.  I knew Mario is a drunk, and Zelda is a bitch.  Anyway, it is a must watch for those of you who have not seen it.  of the amoral elite. When a series of grisly crimes pushes an unlikely champion to seek the truth, a mystery unfolds that could completely destroy everything he holds dear.an Mushroom Kingdom, corruption and avarice reign supreme. Even the greatest heroes of the land have buckled beneath the overwhelming will of the amoral elite. When a series of grisly crimes pushes an unlikely champion to seek the truth, a mystery unfolds that could completely destroy everything he holds dear.

Saturday, March 26, 2011

Project: Basic Cosplay Weapons: Mai's Stillettos

      I wanted to start a series on making cosplay weapons, but some of the stuff I make is a bit complex.  And I'll get there, but let's do a few simple projects first.  Mai, the awesome Fire Nation warrior from Avatar, has an array of weapons.  I'm going to make a set of her stillettos, then a set of the more complex daggers.
A great schematic of Mai's weapons I found from a simple image search.
The stilletto is of course at the top right.  It's a basic cylinder, slender, with a flat 4 sided  not rounded tip. The tip is silver, the shaft is a reddish brown, and it appears to have fletching.
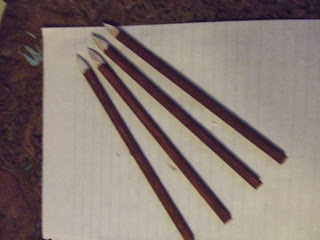
So how to make one, or four.  I started with a quarter inch dowel and cut it into 4, 6 inch lengths.  Then I took each one and wacked the tip with a hammer a few times.  This is for two reasons, to get it to flare out a little and to make it more safe.  If the strands are busted up a little it will bend rather than go through some one.  You can't be to safe with cosplay weapons.  Now I'm gonna carve the point on the end cutting down to the center on opposite sides, then a little on the other two sides. You don't want a rounded point, you want flat blades..
Carving the first flat side. Note smashed wood.
  When I was done I filled cracks in the piece, mostly cause I hit it with a hammer, with spackle
This is the only spackle, all others suck.

Next I thought it would be nice to taper the back of the stllettos a bit just for looks and maybe a place to hold them in the fingers. This shows three of the points and one of the backs.  Now they all get sanded with a 150 or higher grit sandpaper. 
.
 Time to paint, I'm using craftsmart brown, and metallic silver.  Cheap ass craft paint.  Now try not to overlap these paints cause it looks funny.  First some brown on the shaft and silver on the tips.  It will take two coats

Once your happy with the paint job we're going to do some light fletching.I got some white turkey quills from the craft store and sliced them right down the middle with a shrp knife.  I then trimmed some of the hard middle of the feather down, cause these stillettos are small they need delicate  fletching.  I then cut 1 inch sections of the feather, we need two for each stilletto.

Once I trimmed the hard part to my liking I used some gel type crazy glue to glue them on.  Gel crazy glue is much easier to work with.

Now you take a very sharp pair of scissors, Ginghers , and trim the feather like it is in the Mai weapons picture.

Like so.  And there you have 4 stillettos to pierce the hearts of the Fire Lords enemies.  Or you can just hold them while people take your picture, either way.  A simple project, but you will learn things doing simple things that will help you later.